Gluten Free Pie for everyone
I love getting together for a feast so Thanksgiving this year was no exception. We planned our trip months in advance. Later an extended family member decided their family would join us at my parents’ home for the weekend of feast. The menu was set- roast turkey, mashed potatoes and green bean casserole and a request to make gluten free dessert. Pumpkin pie is the queen of desserts for the holiday season so I was excited to be tasked with making a gluten free version of this classic dish.
Making alternates for a classic recipe or using up leftovers in unique ways are two things that make what I do for a living so much fun.
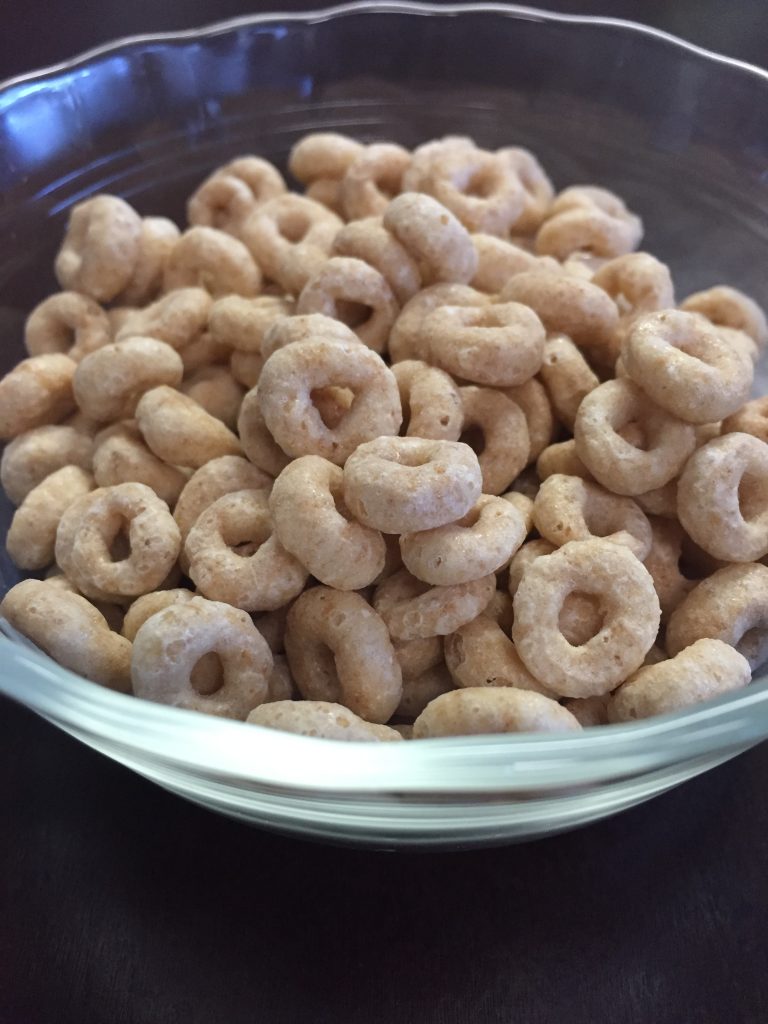
After pursuing the internet for the best versions, I decided to test one recipe before Turkey Day. Gluten free cheerios cereal won me over. The crust was simple and included melted butter, 1 tablespoon brown sugar and crushed cheerios. The pie filling remains the same, as before: pumpkin puree, sugar, cinnamon, heavy cream, egg and salt. After tasting it, I decided the brown sugar in the crust made this too sweet. Therefore, I omitted brown sugar in the crust on the second version.
I crushed the cheerios in the bag they were in to create the smooth crust. Then I blended them in a food processor. Once blended, I combined the cheerios with the melted butter in a mixing bowl and thoroughly mixed the two. If the crust seems dry, keep mixing until it resembles wet sand. The advantage of gluten free crust is you can’t ever overwork the dough, a problem I often experience when making a gluten-laden pie crust.
It was nice to get the help from children in making dinner and especially the dessert. I love it when kids get involved in the kitchen because they devour the food knowing they contributed. When the pie was served to everyone, there were couple slices left. When I returned for seconds, the pie was gone, wolfed down by the kids, of course. They took it upon themselves to have a 2nd serving. And the best part? The verdict of a gluten free crust, “this isn’t just good, it’s amazing!” I’ll take compliments from anyone but especially kids, often the toughest critics.
Gluten Free Pumpkin Pie
8 servings
Crust:
2 cups gluten free Cheerios cereal
4 tablespoons butter, melted
Filling:
1 cup pumpkin puree
1 egg
1 teaspoon cinnamon
1/2 teaspoon ground cloves or nutmeg
1/4 teaspoon salt
1/4 cup brown sugar
1/2 cup or 4 ounces heavy whipping cream
In a large mixing bowl, combine all the ingredients for the filling with a whisk or beater. Make sure everything is thoroughly mixed. Cover the bowl with plastic wrap and store in the fridge while baking the crust. Filling must be made ahead of time to allow time to chill in the fridge.
In a food processor, blend the cheerios until it resembles a coarse powder; finely blended works as well. This is personal preference; I knew my family would prefer a finer grain for the crust than a coarse grain so I blended it until it was smooth.
In a mixing bowl, combine the crushed cheerios with melted butter using a spatula. Make sure most of the cheerios are combined with the butter to resemble wet sand. If after all the mixing it still seems dry, add 1 teaspoon of melted butter.
Press the crust into a 9-inch pie plate, making sure the crust is in one even layer and doesn’t exceed the middle line of the plate. If the crust is too high, it’ll burn while the rest of the pie is baking. When I made this pumpkin pie with the children, we had some moon surface bumps that I had to flatten. Place the crust in the freezer for 10 minutes.
In the meantime, preheat the oven to 350 F.
Place the frozen pie crust in the oven for 10 minutes to par-bake.
Once baked, remove from the oven and allow it to cool. Cooling takes about 30- 45 minutes. It is important to cool it completely before adding the filling.
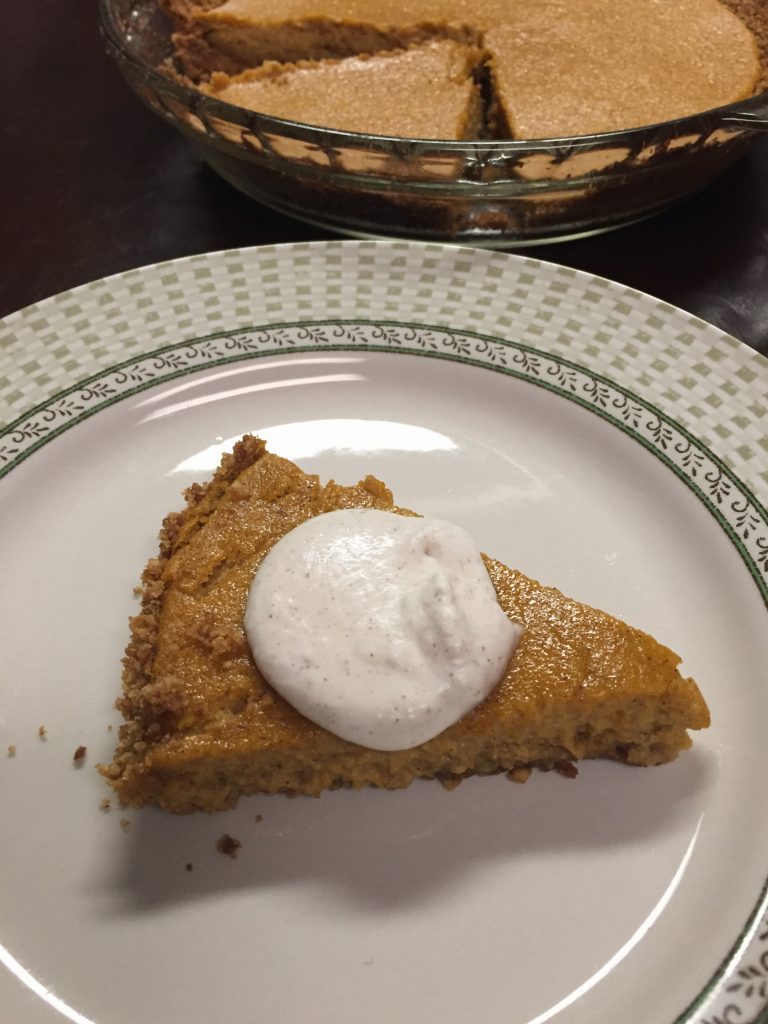
When the crust is cool, add the filling and bake in the oven for 30 minutes. When I first tried this recipe, I had to bake mine for 35 minutes. Test for doneness after 30 minutes if the filling isn’t set bake for additional time.
Cool the pie for at least 30 minutes before serving. Whipped cream is a great accompaniment but ice cream is spectacular. I whipped the heavy cream with powdered sugar and cinnamon for a special touch.
Here’s a bonus tip, this pie can be made using gluten free gingersnap cookies. The day after our Thanksgiving meal, I tried the exact same crust with gluten free gingersnap cookies and that was divine also. Or as the kids said “am-mazing!” Try both recipes and let me know what you think!
Not only did this pie make our thanksgiving gluten free but our entire meal was gluten free; I used cornstarch for the mushroom gravy in the green bean casserole.
.
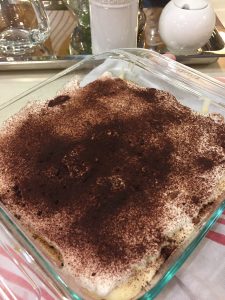
Tiramisu for the Holidays
Since it is so close to Thanksgiving, this is the perfect recipe to bring to the holiday dinner. Thanksgiving is one holiday where we all want to bring something to share. It’s also when hosts rarely take on the responsibility to cook the entire meal on their own.
It’s easier to bring a dish to share than to host and cook everything on your own. Unless you’re me. In my case, I make turkey, mashed potatoes, gravy, green beans, stuffing and a dessert all on my own. I am not crazy, I just like it that way. But most of the population that’s sane and has a bit of sense offers to host and cook turkey while asking guests to bring the extras.
If you find yourself being invited to Thanksgiving dinner I recommend bringing this Tiramisu. It comes together in no time and best of all it’s better as it sits so you can make this on Wednesday and drink enjoy your way through Thursday.
I created this after someone said to me they had a terrible tiramisu experience at a restaurant. On the menu it was listed as chocolate tiramisu and that intrigued them to order it. And out came a molten lava cake concoction with mascarpone something or another. Lost in execution, clearly. This person had issue with the fact that the ladyfingers that make the dessert were replaced by a cake. I agree. I would go even further in saying, why weren’t chocolate ladyfingers used? To that you say, “I’ve never seen chocolate ladyfingers”, me either actually. But if a restaurant has Chocolate Tiramisu on their menu and can’t find chocolate ladyfingers then that’s a project for the pastry chef, create chocolate ladyfingers in house.
I was clever enough to not attempt chocolate ladyfingers or call it that. I am just calling this Tiramisu, my original version. The key to the recipe is using fresh eggs, using strong espresso and allowing the dessert to sit in the fridge for 12 hours, minimum, before serving. That’s it. Seems simple but I’ve had plenty of average tiramisu where the pitfalls could’ve been avoided.
Note, most Americanized versions of the recipe call for incorporating whipped cream to the mascarpone mixture, unnecessary. Many Italians, where Tiramisu originated, don’t even like whipped cream on top as we do here in America. The whipped topping is at your discretion. I’ve served it both ways and guests enjoyed each. Also, Marsala is the traditional alcohol of choice but I don’t like it. I’ve tried it with various alcohol flavors and opted for Amaretto as my liqueur of choice. If you use rum, baileys or something else I can’t promise you the Tiramisu will be amazing. Just putting it out there. Buy Amaretto and add it to this and drink it with your coffee, you can thank me later. You’re welcome.
Tiramisu- my version
6 generous servings or 9 regular servings
1/4 cup or 60 grams sugar
3 large eggs, separated, using 3 yolks
1 cup or 8 ounces mascarpone cheese
2 egg whites
1 cup strong espresso, cool or room temperature
1/4 cup Amaretto
18 savoiardi (Italian ladyfingers)
1/4 cup chilled heavy cream
1 tablespoon unsweetened cocoa powder for dusting
In a glass bowl, beat the 3 egg yolks with sugar until thoroughly incorporated. When the mixture is pale yellow, it’s ready. Whip in mascarpone until just combined. If clumps form, continue to mix with a whisk.
In another bowl, beat 2 egg whites with hand mixer until stiff peaks form.
Fold egg whites into the egg yolk and mascarpone mixture. It takes a little work and being very gentle but folding egg whites in with a spatula is key to light and fluffy mixture.
In another clean bowl combine the strong espresso with Amaretto.
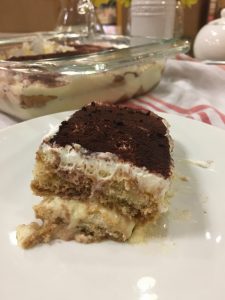
Dipping both sides of each ladyfinger into the coffee mixture, line bottom of an 8 x 8 square pan with dipped ladyfingers. Dip one ladyfinger at a time to layer the pan. Spread 1/2 mascarpone filling on top of ladyfingers. Repeat with second layer.
After the last layer of mascarpone, cover the pan with plastic wrap and refrigerate. The dessert should sit in the fridge for 12 hours minimum and up to 24 hours.
In another clean glass bowl beat heavy cream with a hand mixer until it holds stiff peaks.
After the initial 12 hour rest, top the tiramisu with whipped cream over the mascarpone mixture. Cover and chill for another 2-3 hours and up to 24 hours.
The tiramisu can be refrigerated for 36 hours total, if you can wait that long.
Remove the tiramisu from the fridge and let it stand at room temperature for 30 minutes. Dust with cocoa powder before serving.
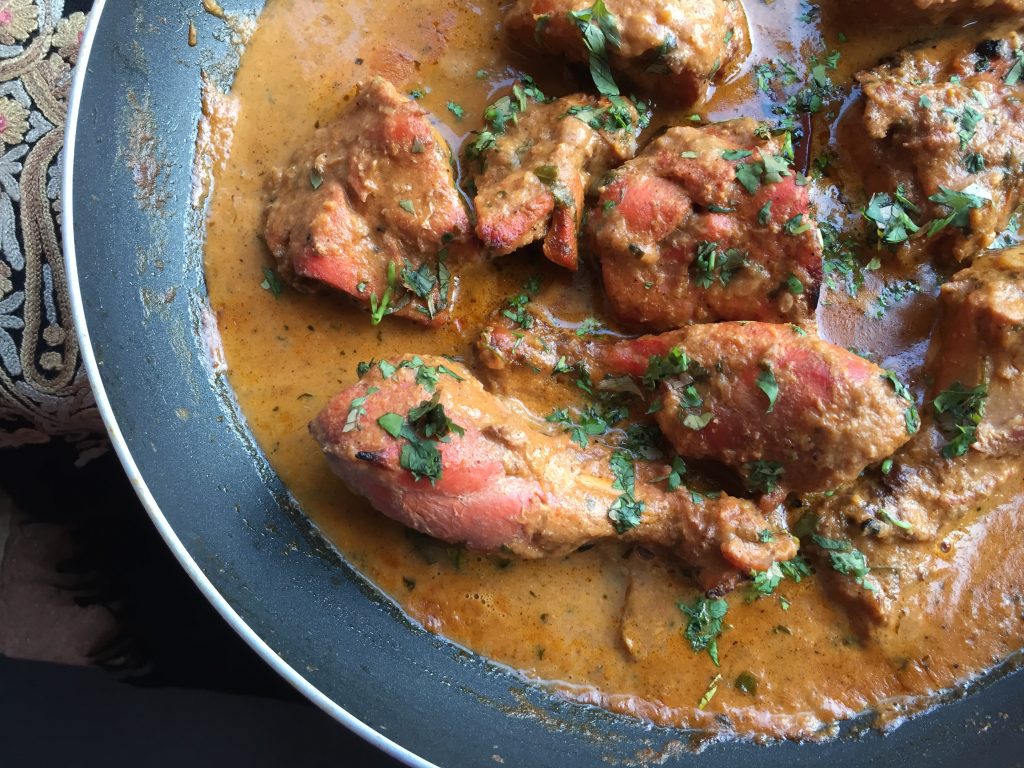
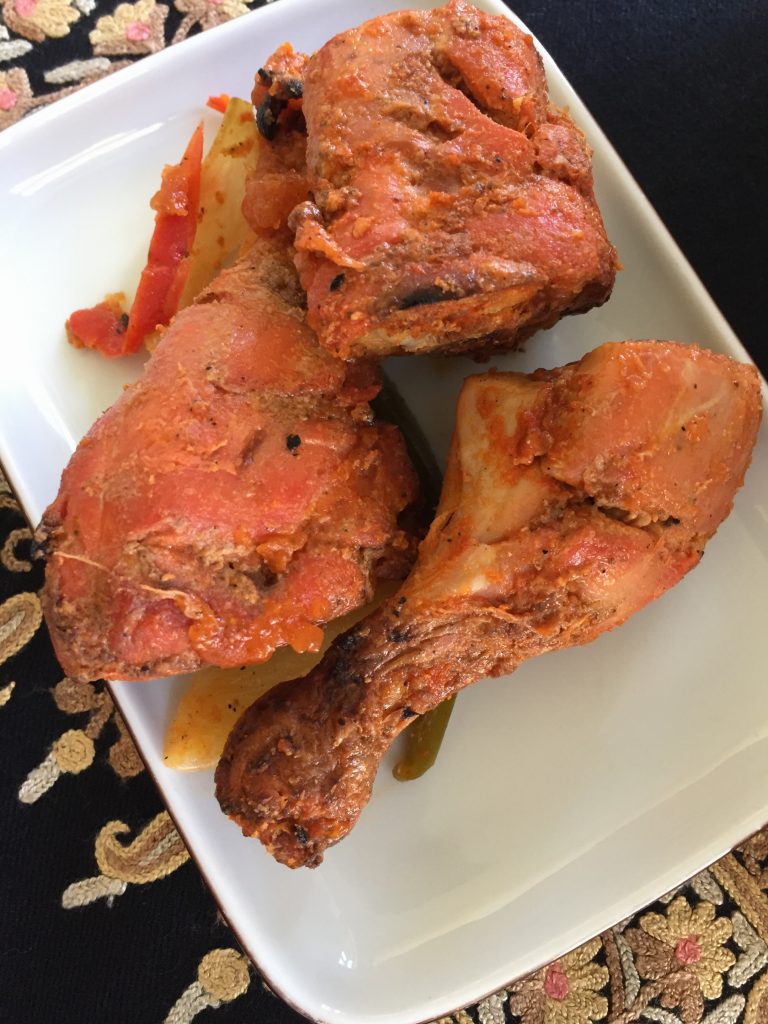
Tandoori Chicken in Rich Sauce

We went to an extended family’s home last weekend for a Diwali (Hindu festival) party. It was a group of 15- 20 adults and little ones. We even had fireworks. Because fireworks are lit in India for any occasion but specially to celebrate Diwali. And since living in Atlanta is akin to living in India, with large Indian population and many Indian grocers and clothing boutiques, it’s only fitting the families that live here eventually started celebrating Diwali with the fireworks. The popularity of the festival in America was affirmed when we heard neighbors on other streets light their fireworks. The saying is, you can take an Indian out of India but you cannot take India out of an Indian. Last week when I went to the part of the town with all the major Indian grocers and shopping centers, I felt like I was in India. As soon as I stepped out of my car, I heard blaring Bollywood music and the stores were crowded to the brim of customers wanting to get a piece of the sale. Diwali mythically represents the battle of good winning over evil. It is celebrated with lights, hence the name festival of lights. People buy new clothes, valuables and cars on this day because it’s auspicious and the happiest day of the year. It is also the Hindus Christmas because friends and family buy presents for their loved ones.
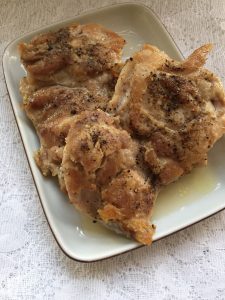
Last weekend at the party, there was lots of food to munch on. There were appetizers as well as main course. The appetizers featured tandoori chicken, the famous red (colored) chicken ubiquitous with Indian restaurants. If made correctly, it is chargrilled and tastes spectacular. The best part of the grilled chicken is the burnt edges that add the flavor to the meat. Traditionally tandoori chicken gets its name from the oven it’s cooked in, Tandoor, a clay oven that’s heated with wood or charcoal. On the street side stands in India, vendors have one or two large clay ovens that are used to grill the chicken and make the naan, an Indian bread that’s made with all purpose flour. I have no idea how the Indian restaurants in America make theirs but it is reminiscent of the traditional tandoori chicken in India.
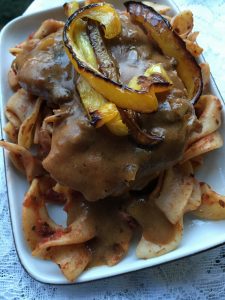
At the end of the party the host offered all the guests leftovers from the dinner. I offered to take the tandoori chicken. Bringing it home, I knew exactly what I was planning to do with it. Make a chicken curry with my own spin on the ingredients and recipe. Many people that order butter chicken or chicken makhani in restaurants will recognize the look of this dish. The key difference in my recipe and the butter chicken is that chicken must be grilled or baked before being added to the sauce. Ideally a tandoori chicken from a restaurant is best (or having family host a party and bringing home leftovers) but in a more realistic scenario, buying a rotisserie chicken works just fine in this. I bet this would work with roasted turkey as well, for those of us that are already looking for leftover turkey recipes.
This take 45 minutes so it’s ideal weekend dinner or entertaining guests. This recipe can be doubled. With store bought naan (or pita) and some plain rice, this is the perfect meal for dinner or entertaining. It’s especially good for a cool Fall dinner with lower temperatures and we are all trying to find ways to stay warm. The green chilies in the sauce make it spicy and that’s how it is supposed to be! Any of you that shy away from heat, this is the time to add it because heat is lessened with cream and flavors of sautéed onions and tomatoes. The key is to get the tandoori chicken or buy a rotisserie chicken from any grocery store. If using rotisserie (or leftover roasted turkey), make sure you add the extra spices (as I have noted) to enhance the flavors.
The benefit of having a recipe like this that takes time to cook is it allows you to prep the ingredients as you go. No need for having everything chopped and ready initially. But be sure to read the recipe in its entirety so you know what ingredients to have on-hand.
Tandoori Chicken in Rich Tomato Sauce
serves 2 generously
2 pounds bone-in grilled or roasted chicken pieces
1 bay leaf
2 dried red chilies
1 medium red onion, diced
2 cloves garlic, peeled and minced
1 inch ginger, peeled and minced
1/2 of jalapeno or another spicy green Chili*, finely chopped
1 ground Cumin (if using rotisserie chicken, use 1 1/2 teaspoons)
1 ground Coriander (if using rotisserie chicken, use 1 1/2 teaspoons)
1/2 teaspoon Garam Masala** (if using rotisserie chicken, use 1 teaspoon)
1 teaspoon kosher salt
1/3 cup tomato puree (crushed tomatoes work as well)
1 cup chicken or vegetable stock
1/4 heavy cream
1 1/2 tablespoons dried Fenugreek leaves***
1 teaspoon chopped cilantro, optional
*Be sure to use a spicy jalapeno or serrano pepper, the heat adds a dimension to this dish. My jalapeno is devilishly hot so I only used half. Use yours accordingly.
**Garam Masala is found in Indian stores, and the options are endless so pick one that looks good to you. In the ingredients list look for cloves, red chilies, cumin, coriander, cinnamon & black peppercorns. I’ve seen some with nutmeg and mace and those are fine ingredients to have in garam masala but not necessary. Avoid buying garam masala at an American grocery store because it can be old and off.
***Fenugreek in dried form is more flavorful than the fresh and is a better alternative in this recipe. It can be found in Indian stores.
In a 10- 12” non-stick skillet, heat butter on medium heat. When the butter has melted, add bay leaf and 2 red dried chilies. Cook the whole spices for 30 seconds and then add diced onions to the pan. Turn down the heat to medium low to allow the onions to cook for 3 minutes without burning, stirring occasionally.
Add the garlic, ginger and green chili and cook for 1 minute. Add the spices and salt and cook for 30 seconds. Increase the heat to medium, stir in tomato puree and stock. When the sauce begins to slowly bubble/simmer, reduce the heat to low. Add the bone-in chicken pieces and cook for 20 minutes, covered. It is important to cover the pan to allow the flavors to infuse the chicken.
Uncover, stir in heavy cream and fenugreek leaves and cook for 10 minutes. Taste and add salt if necessary.
Garnish with chopped cilantro, if using. Serve warm with rice and/or naan.